Skip to content
  • SPARTAN TRAIL
  • DEKA
  • PEAK
  • OCRWC
  • LA RUTA
  • M20
  • HIGHLANDER
  • COMBAT
  • SPARTAN
Military & First REsponders Get 30% off with GOVX until May 31 GET VERIFIED
COUNTDOWN to WORLD's Toughest Mudder
2025/06/28 01:00:00
Tough Mudder Logo
Find An Event
  • Find an Event
  • What Is Tough Mudder
    • About Tough Mudder
    • Endurance Events
    • Kids by Spartan
  • Mudder Ready Quiz
  • Obstacles
  • Mudder Passes
    • Season Passes
  • Group Packages
  • Programs
    • Innovation Lab
    • Adaptive Athlete Program
    • Train With Us
    • Become an Ambassador
    • Discounts
  • Volunteer & Run Free
  • Mudder Legion Rewards
  • Shop Gear
    • Shop All
    • Men’s
    • Women’s
    • Headwear
    • Accessories
    • Sale
  • Photos and Endurance Results
    • Photos
    • Endurance Results
    • Endurance Hub
  • Learn More
    • Blog
    • Share Your Story
    • FAQ
    • Get In Touch
  • Our Brands
    • Spartan Trail
    • Deka
    • Peak
    • OCRWC
    • La Ruta
    • M20
    • Highlander
    • Combat
    • Spartan

Article Category: Fitness

Fitness

How To Tackle The Gauntlet

Author: Tough Mudder February 28, 2022
Share on Facebook Share on Twitter
gauntlet

With four dastardly sections rolled into one 100″ long obstacle The Gauntlet poses quite the challenge. Get ready to tackle Gauntlet.

So to help out Mudder Nation we’ve pulled together our top tips for overcoming each tricky little test so that you and your team can emerge victorious when you take on your Tough Mudder course.

FOUR TIPS TO TACKLE GAUNTLET

1. HAND IN HAND

Ah, a simple balance beam. And yet, it isn’t so simple especially if you’re wet and muddy (say, after taking on a few miles of Tough Mudder).

The best solution for successfully owning this section of The Gauntlet is to team up and hold hands as you traverse the beam.

Sounds silly but it will give you some much needed balance and teamwork is kind of the whole point of Tough Mudder.

2. BUST A GUT OR DANCE THE POLE

No we haven’t lost our minds. This section of The Gauntlet gives you the opportunity to choose between two classic Tough Mudder obstacles; Gut Buster or Pole Dancer.

If you’ve got decent upper body strength give Pole Dancer a go. Place a hand on either pole, lift yourself up and lock your arms, then shuffle your way to success.

Not sure if you can depend on your arms? Gut Buster is a full-body experience. Place your feet on one bar, your hands on the other and keep your core engaged.

3. CYCLE HIGHWAY

The monkey bars might look like they only test your grip strength and upper body but the secret is remembering to engage your legs.

Swinging your legs (in a way that sort of looks like you’re riding a bicycle) will give you the momentum to swing across the bars.

4. DON’T BE A SHEEP

There’s one more choice to be made in the last leg of this epic challenge. Will you pit your fingertips againt Just The Tip (a tiny wooden ledge) or Human Gecko (more like rock climbing holds)?

Either way, our best piece of advice is to be creative.

Think you can stomach The Gauntlet? Grab your tickets now.

Fitness

Tips for varying group exercise

Author: Tough Mudder January 10, 2022
Share on Facebook Share on Twitter
tips for varying group exercise

When you work out with others who are at different fitness levels you’re likely to:

  1. Feel more motivated: when you encourage each other, you’ll work harder (and get better results). And there’s nothing wrong with a little friendly competition.
  1. Be more adventurous: this can sometimes feel more like fun and less like a workout. 
  1. Be more consistent: when someone else is counting on you to show up, you won’t want to let them down.

Here are some tips for varying group exercise with people that are at a different fitness level than you:

  1. Modify the exercise. Let’s say you and your group are going to go for a jog… but your group has different paces and some are a bit slower than yours. Instead of jogging with them at their pace, you can perform sprints then turn around jog with them then sprint again and continue until you finish your jog .
  2. Use Different Weights. If you’re at the gym, you and your group can all use different weights. There is nothing wrong with one person using 20lbs and another person using 10lbs. Who knows, maybe the person using a lesser weight can even be encouraged to try a set at a heavier weight with some extra support and motivation.  
  3. Perform Different Number of Reps/Sets. If using different weights isn’t possible or changing weights is time consuming, such as with bench press, use the weight that is comfortable for all people. However, just because you are using the same weight doesn’t mean you need to get less of a burn. If one person is comfortable only doing 10 reps at that weight, maybe the person who wants to lift heavier does 15 reps. Or have the person who can handle a heavier weight go first, and they can add on one additional set at the end.
tips for varying group exercise

Time Based Workouts

One thing that is constant for everyone’s time. Interval workouts, such as Tabata, AMRAP, and HIIT (ie. 45 seconds of work, 15 seconds of rest), are a great way to workout with a large group, regardless of everyone’s fitness levels. Maybe you can perform 10 pushups in a minute, while another person in your group can perform 20. You will each be able to push yourself to your own limits, but still be performing the same exercise together.   

Here are some exercises for all levels.

1. Squats, body weight . 

2. Pike press-up 

3. Dead -Bug 

4. Plank 

5. Wall Sits 

6. Push ups / Modified 

7. Burpees / Modified

8. Mountain Climbers

Weight Workouts :

1. Bicep Curls 

2. Lateral Raises 

3. Bent Over Rows

4. Standing overhead presses 

5. Dumbbell lunges 

When participating in group exercise with people of all different fitness levels, you will find that you can accomplish more than you ever thought was possible. You will be capable of so much more than you could ever have imagined. At Tough Mudder, people of all fitness abilities are encouraged to participate, regardless of how fast you are or how much you can lift. Join us in 2022 where Mudder Nation knows no pace or max deadlift.

Fitness

Warm up tips: exercising in the cold

Author: Tough Mudder January 10, 2022
Share on Facebook Share on Twitter

When the temperature drops, even the most devoted outdoor exercise devotees may be tempted to stay inside. Training in the dead of winter can suck, quite frankly — we’re talking icy runs, brutal trail conditions, and workouts in the dark.

Of course, with that it means it’s harder to motivate yourself to get outside, and it requires some changes to how we exercise. However, with a proper warm-up and the right cold-weather workout apparel, your outdoor workout might just feel — dare we say — a little bit easier and more appealing. Cold weather places unique stressors on the body. In addition to a decrease in blood flow, the cold causes a co-contraction of opposing muscles, or what you’ll more likely know as shivering. While you’re not necessarily more prone to injury in the cold, without a proper warm-up, you may be more susceptible to decreased reaction times and impaired movement patterns.

Before you trek outside, perform a dynamic warm-up routine (leave the burpees or sprints for later intervals) – a full body warm up isn’t just a nice to have, come winter is a MUST do.

Reasons why warming up prior to your winter run will result in better performance:

·  Greater efficiency of joints, muscles, tendons and ligaments

·  Greater range of motion

·  Increased oxygen availability

·  Increased lung capacity

·  Release of stored fat for energy

·  Creates a routine for mental preparation

Here are 5 Warm Up Exercises you can do at home:

Increase circulation with the following series of dynamic movements, which are designed to increase blood flow and begin to wake up your glutes which are often inactive from sitting

  1. Hip circles
  2. Knee circles
  3. Leg swings
  4. Squats
  5. Trunk rotations

Now that your muscles are warmed up, spend the next two minutes performing this sequence of fast-paced moves:

o   Jumping jacks

o   Front lunges — focus on the push off and activating the glutes

o   Side lunges

o   Squat jumps — focus on landing very lightly


Last (and certainly not least important) tip: Do NOT forget about hydration, as its just as important in cold weather when you are exerting yourself.

Fitness

6 Exercises for Gym Beginners

Author: Tough Mudder January 10, 2022
Share on Facebook Share on Twitter

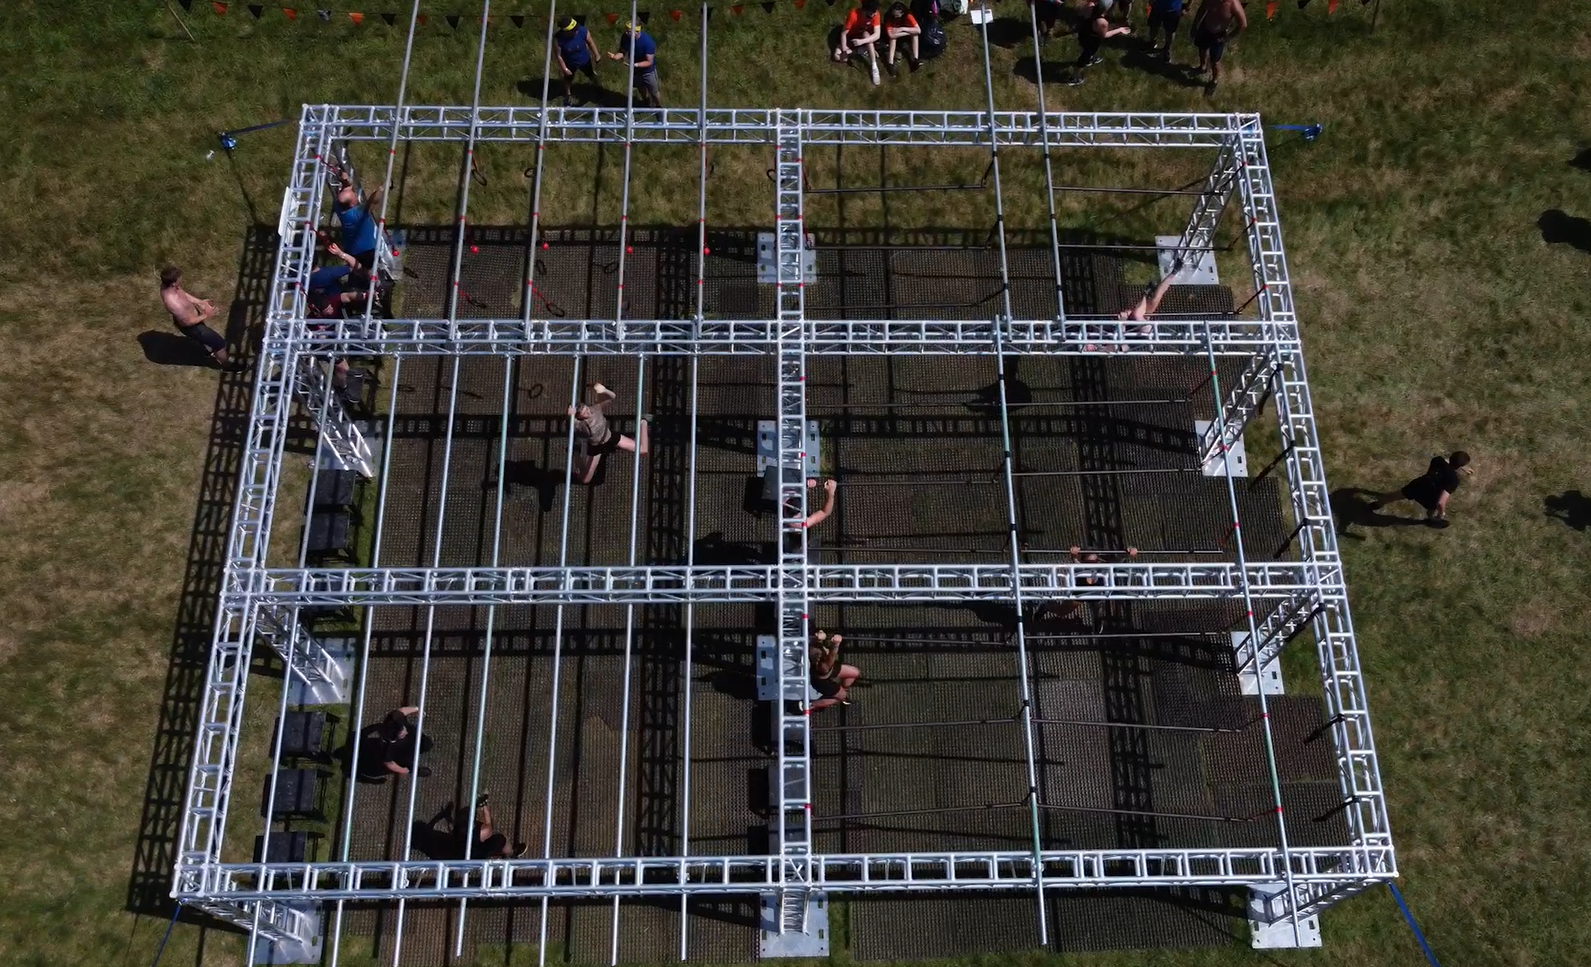
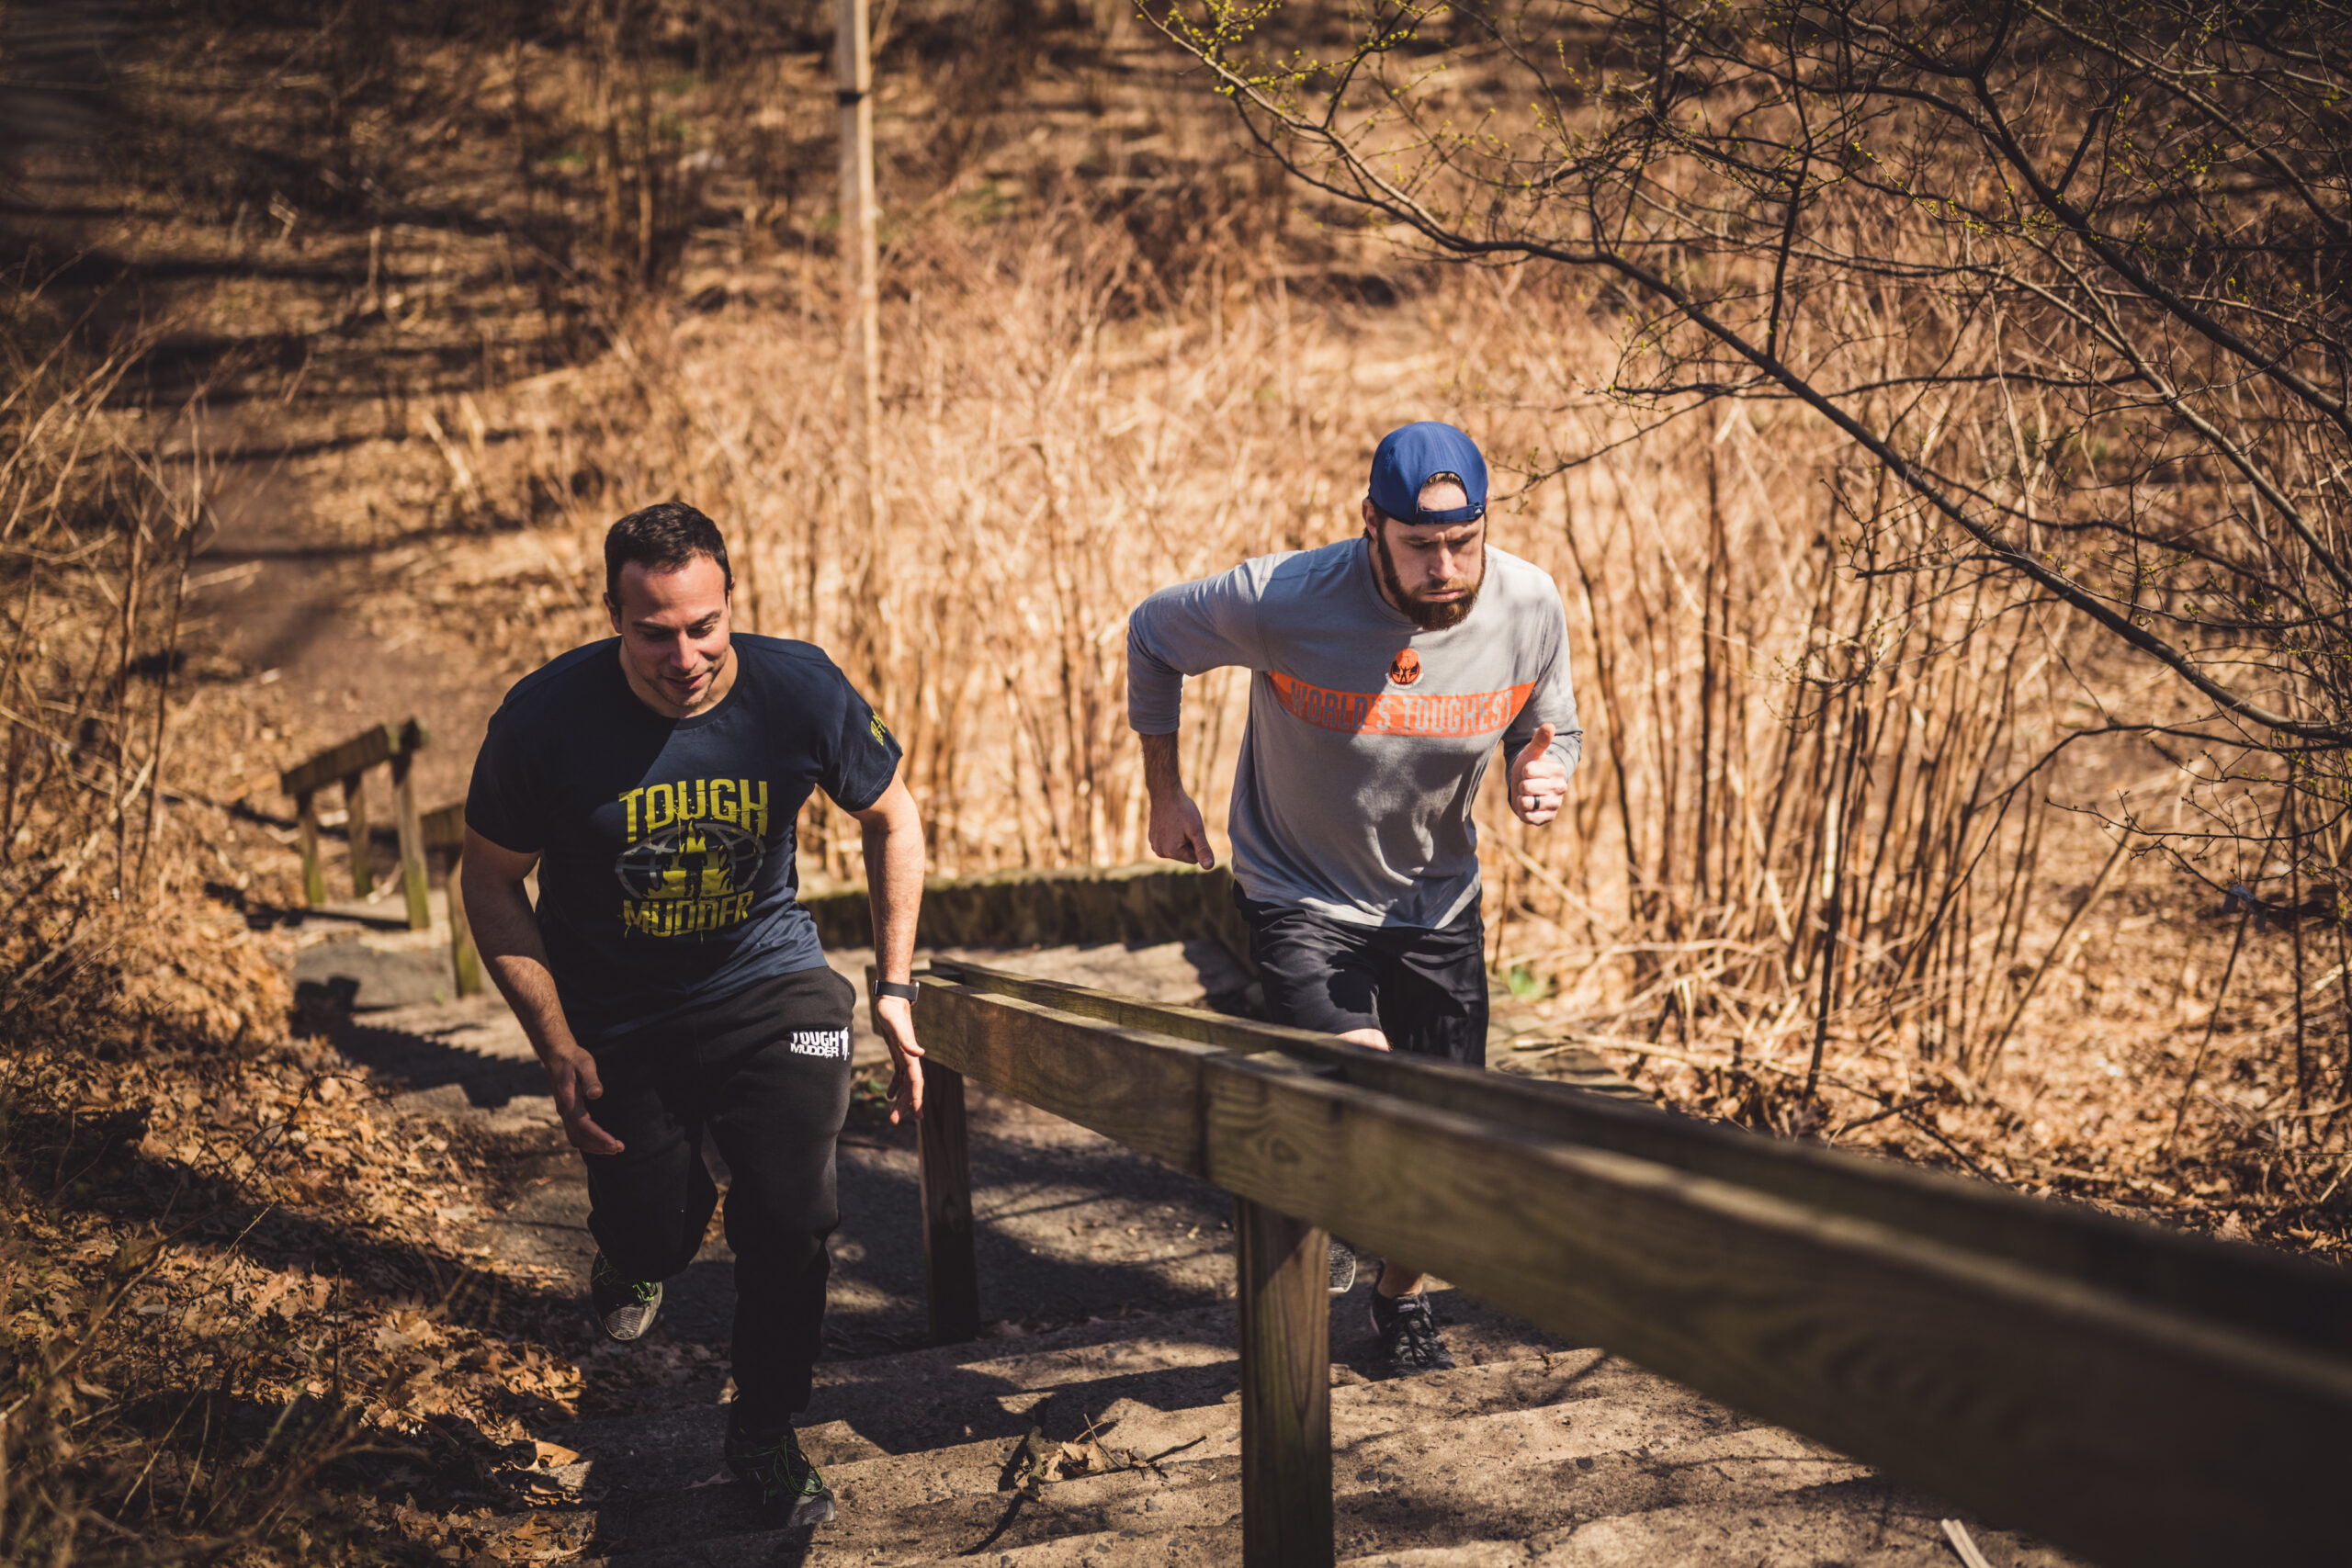
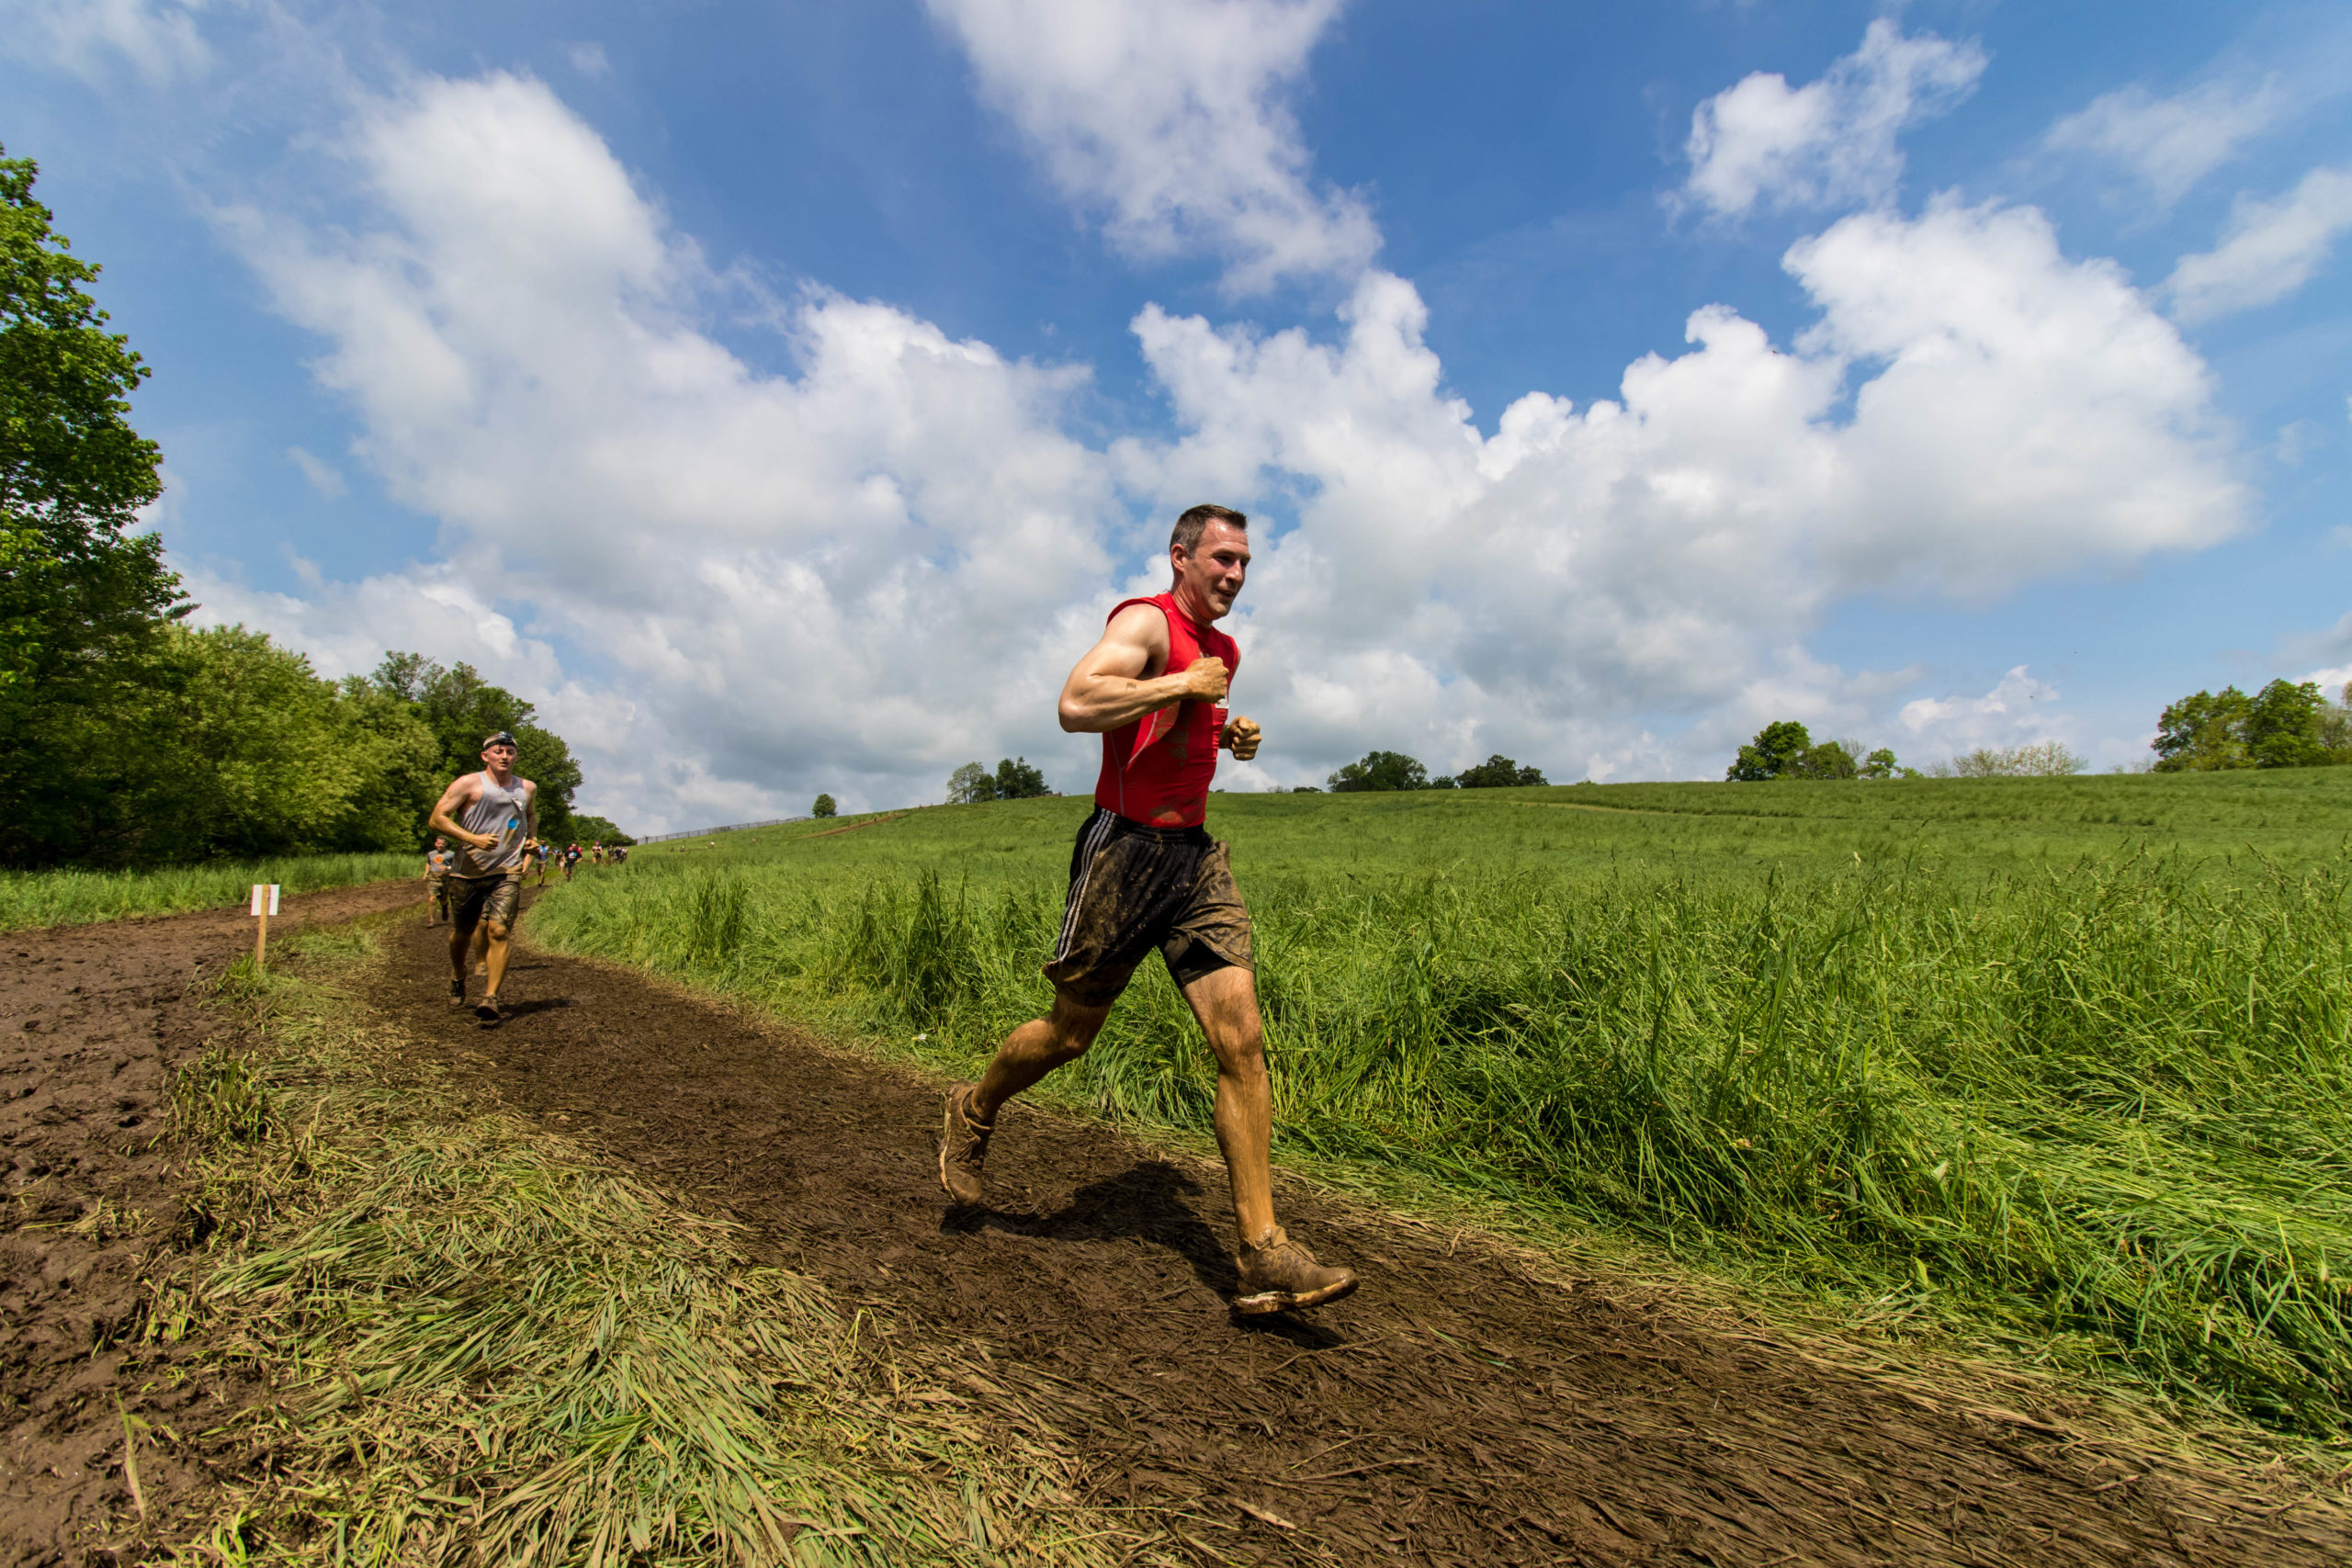
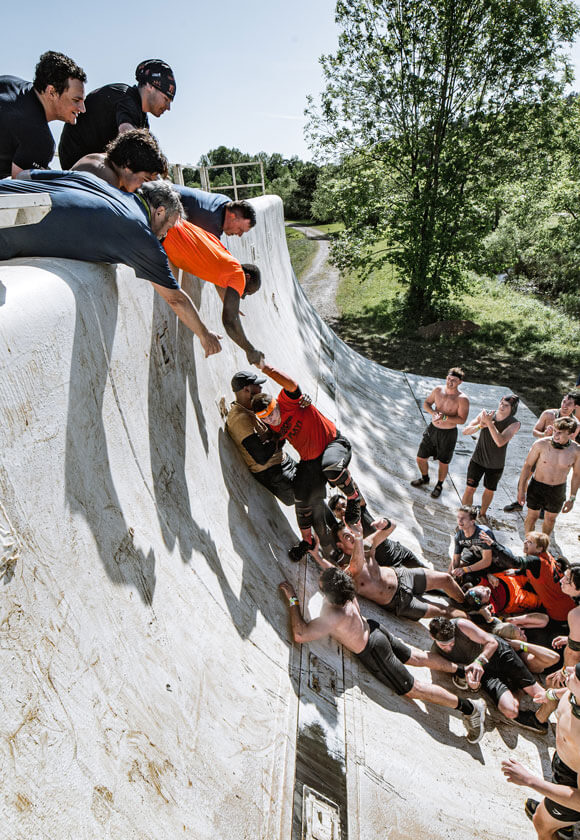
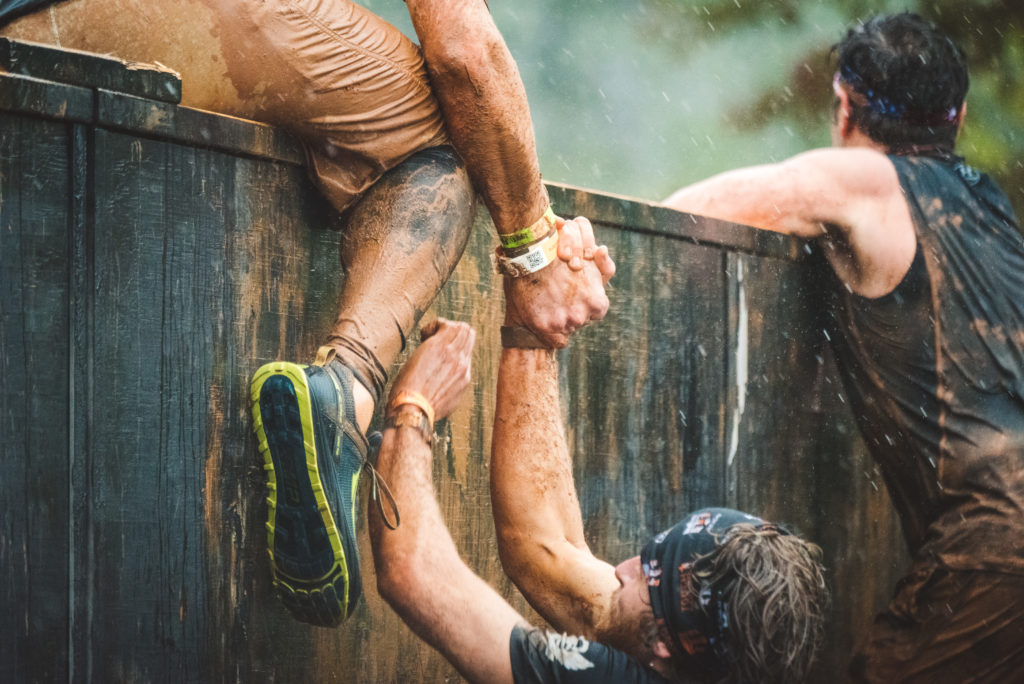
Obstacle course racing, or Tough Mudder events, is the sport that mixes running and pre-constructed obstacles to challenge your mind and body in a unique way. There are competitive heats, or just-for-fun heats where you get to play in the mud like a kid again. Regardless of your obstacle course race goal, one thing is for certain: You will learn a lot about yourself at these events.

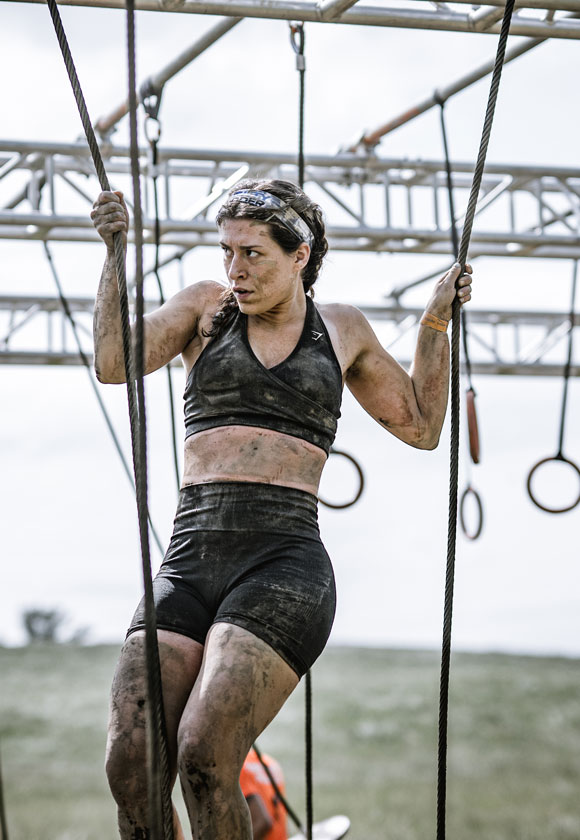
Have you done a Tough Mudder event yet? If you have, then you know these events challenge not only your endurance, but also your strength, agility, and mental grit. You will likely be required to jump over walls, climb ropes and crawl through mud. To do this well, you can’t just train linear movement patterns (like standard squats, deadlifts, rows, etc.). So, when it is cold outside and you’re in your gym,  you will definitely have to get creative with your workouts, focusing on full-body movements that increase your power, flexibility, stability, and grip strength. These exercises are designed to help you conquer every obstacle you might find on the Tough Mudder course. You’re going to load your body unilaterally, asymmetrically, and unconventionally to build an unbreakable core, unshakeable stability, and unbeatable strength. Are you ready? Here are some common exercises and tips for beginners hitting the gym:
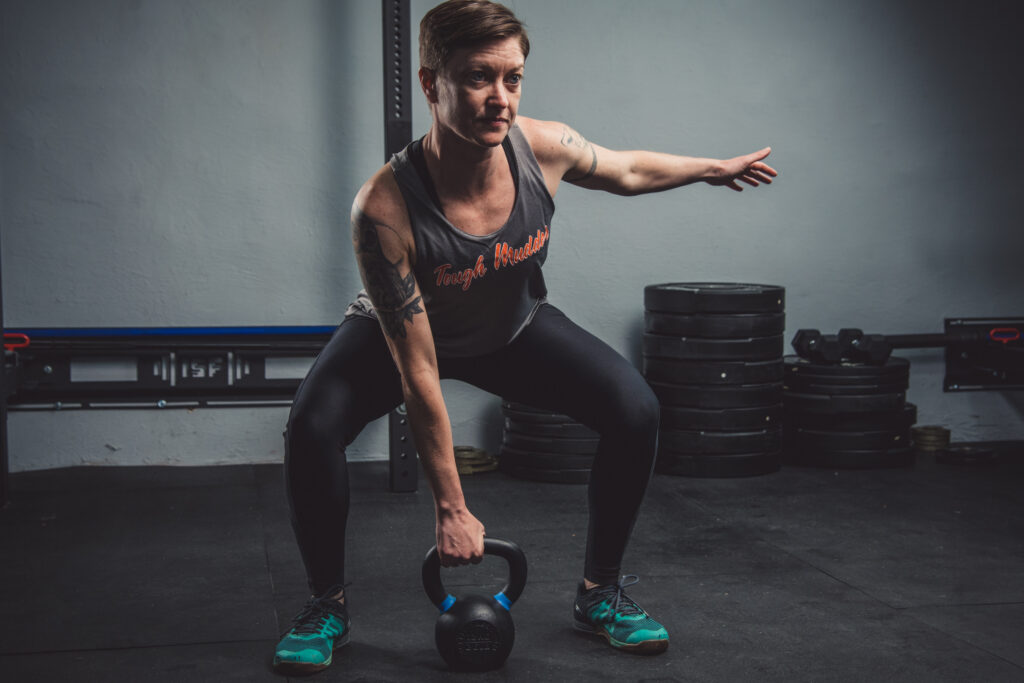
  1. DB Goblet Squat

These are excellent exercises to build leg strength and core stability. 

+ Instructions: Stand with your feet about shoulder-width apart, and slightly turned out. Holding the weight at your chest, get tall through your spine and pack your shoulders. Keeping your chest tall and core tight, bend your knees and bring your hips down towards your heels. Make sure to track your knees over your 2nd toes (don’t let your knees collapse in). Inhale as you pull your hips down, and exhale as you drive through your feet to stand tall again.

2. Plank Kettlebell (or Dumbbell) Drag

Having a strong, stable core will help you conquer so many of the obstacles you will likely encounter – crawling under barbed wire, crossing a cargo net, walking across rope ladders, etc. The plank kettlebell drag will not only build your core endurance, but also your anti-rotational strength. The key is to keep your shoulders and hips square as you drag a heavy weight underneath you.

+ Instructions: Start in a high-plank position – hands on the ground, arms fully extended, and feet about hips-width apart – with one weight outside of your right hand. Get long from head to heels. If you’re doing plank correctly, you should be able to draw a straight line through your head, shoulders, hips, and heels. Maintaining this strong position, reach your left hand underneath your body to grab the weight and drag it along the floor to the outside of your left shoulder. Then plant your left hand, and reach your right hand underneath you to drag the weight back to the right. Keep going, and don’t let your hips or shoulders dip or twist.

3. Kettlebell (or Dumbbell) Suitcase Carry

You’ll probably face an obstacle that requires you to balance, whether that means crossing a balance beam, hopping from post-to-post, or walking across a rope bridge. Your ability to maintain stability is crucial. That’s your focus here. To make this exercise more challenging, step one foot right in front of the other, as if you were walking on a tightrope.

+ Instructions: Choose a moderate- to heavy weight, and hold the weight in your right hand. Stand tall with your shoulders and hips square, shoulders packed, and core tight. Step your right foot directly in front of your left without letting the weight pull you off-center, and without leaning to the right. You should feel your core working hard to stabilize your spine. After 30 seconds, switch hands and repeat.

4. Box Jumps

You will be required to jump over logs, or even walls. In order to overcome these obstacles, you’ll need enough power in your legs to get some serious height. That’s where box jumps come in. You can either train this exercise for max speed, or for height. I recommend focusing on height.

+ Instructions: Choose a tall box that you know you can safely jump onto. Start by standing tall facing the box. Squat down, and then drive powerfully through your legs while driving your arms to land softly on top of the box in the squat position. Make sure to land with soft joints, and drive your knees towards your 2nd toes. Don’t let your knees collapse in. Step down off the box, reset, and repeat by jumping back up on the box.. 

5. Inverted Rows

To prepare yourself to climb an inverted wall out of a muddy water pit, or traverse across a hanging rope, you’ll want to increase your horizontal pulling strength. The inverted row does just that. Instructions: Holding onto a squat bar or a suspension training system (like TRX), step your feet forward so that you’re leaning back. Keep your hips lifted by engaging your glutes and squeezing your abs. Pull your chest towards the bar while keeping your body in a straight line. Lower yourself back to the start position with control. For a greater challenge lean further back, or elevate your feet on a box or bench.

To make this exercise easier, don’t lean back as far. For a greater challenge, place your feet on an elevated surface.

6. Resistance Band Sprint-in-Place

The hardest obstacle on your Tough Mudder course might just be the steep, relentless hills the terrain sometimes calls for in-between obstacles. Practicing resisted sprints will build your hamstring and glute power, so you can charge the hills and beat the fatigue.

Instructions: Attach a super band to a solid anchor point. Step into the band so that it’s against the front of your waist, and take a few steps forward. Leaning slightly into the band, begin “sprinting”. You won’t go anywhere, since the band will be holding you in place. Pump your arms and drive your legs as fast as you can, with control.

The most attractive thing about Tough Mudder events is that you don’t have to follow a specific training plan to prepare. Everyone starts at a different fitness level and brings their own strengths and weaknesses. That said, these movements represent the “universals” that will help you on any Tough Mudder course, with Mudder Nation there to give you a hand if you need anything. 

Fitness

Tough Mudder Training: 3 Reasons To Enroll Today

Author: Tough Mudder December 1, 2021
Share on Facebook Share on Twitter
Tough Mudder mostly has event formats that ARE NOT timed races. So, why should you train for a Tough Mudder? Can’t you just go through it, finish and call it a day? Sure – we welcome all goals and objectives, but if you are entering Mudder Nation – join in head first with no excuses. Below we list out 3 reasons why you should consider Tough Mudder Training, especially if this is your first Obstacle Course experience:

1. Boost Confidence through specific exercises

  • Being able to successfully complete all of the obstacles is a goal for most people, but many don’t know where to start and the exercises you need to do to prepare for such a feat. Our training program will leave you feeling stronger and ready to conquer the obstacles. The 5 week program uses specific exercises that are geared towards each obstacle to prepare your body for the event, so you cross the finish line feeling your best.  

2. Injury Prevention

  • Have you thought about how you will feel after the event? Training will make you feel less sore and most importantly: it will help with injury prevention. A good training program will help to improve muscle function, strengthen your tendons and ligaments and will help your body handle the stress of the event. 

3. Support from a certified Tough Mudder Coach and your fellow peers

  • In our training program, you will have direct access to your coach and the community you will be running with in your program. You will be able to prepare for your event by asking questions, receiving valuable tips and even finding new running buddies. So much information will be shared, from tips on how to perform obstacles, to nutrition tips and how to live a healthy lifestyle – that you will cross the finish line feeling fulfilled alongside your program members.

Tough Mudder Training begins 5 weeks out from your Tough Mudder. All you need to do is register for the program when you sign up on active.com or if you forget this step, you can enroll here. See you in the mud.

Fitness

Community off the course: Tough Mudder Training

Author: Tough Mudder November 10, 2021
Share on Facebook Share on Twitter

We all know that togetherness and teamwork exist on the Tough Mudder course before, during and after…that is what is so special about the Tough Mudder community. But, what about OFF the course in a fitness & training setting with other Mudders? Does this exist in a Training group? How about in a virtual setting? Let’s look at the elements that exist in a training group and why it helps you along your fitness journey:

  • Motivation and Accountability:

Most people can follow a training program, but having someone to celebrate your wins with is that much better. In the training groups, you are encouraged to post your successes (and your failures) in the group so your coach, and your fellow Mudders can cheer you on, and motive you to keep you accountable for your actions to better yourself. 

  • Teamwork:

Virtual teamwork? Is that even a thing? Of course it is. Sure, the teamwork in a virtual training group looks a little bit different than what you will see on the course – but it still is the same group of like minded people. It could be as small as asking questions that other Mudders might have, or it could look like another mudder cheering on another and offering words of encouragement.

  • Listening and Learning:

Each week, our certified Tough Mudder Coach (Coach Shayne) will post videos of helpful hints that will help you conquer the course. Some topics will cover general tips to help you lead a healthy lifestyle, while other topics will cover tips on how to take on an obstacle.

Not only will you learn from Coach Shayne, but you will learn from your fellow mudders as well who are doing the same thing as you. You will be able to get tips from Legionnaires (people who have done multiple Tough Mudders) as well. Hearing about other people’s personal experiences can help you be as prepared as possible.

  • Pushing Your Comfort Zone:

While you will certainly push past your comfort zone with the actual workout program, Coach Shayne also wants you to push past your comfort zone in the Virtual Training group as well. It takes a lot of courage to post about your workouts and how you are feeling through the program. Post that proud sweaty selfie, post when you’re not feeling motivated, etc. You will find that you are not alone.

With our 5 weeks to Tough Mudder Training program, you can expect the above support, in addition to a comprehensive weekly workout plan that maps out the progressive exercises and tips/tricks you need to crush Tough Mudder obstacles. What are you waiting for?

Shayne Haley
Fitness

Interval & Stamina Training: where to start

Author: Tough Mudder Bootcamp November 3, 2021
Share on Facebook Share on Twitter

You’re trudging through mud, crawling beneath barbed wire, hopping over obstacles and then running long distances. Ranging from roughly three to ten miles,  Tough Mudder events consist of plenty of muddy water and military-style obstacles designed to test the participant’s stamina. 

Crossing the finish line on an obstacle course race requires strength, stamina coordination and a lot of mental toughness. Unlike training for a traditional race, Tough Mudder event weekends require  focus on every aspect of functional movement.

Below are some tips on how to start to get in the mode for these types of events, as you will be needing a certain level of internal Strength and Stamina to complete the course, and feel great at the finish line.

The majority of workouts you might do prior must target the precise movements needed to overcome the  obstacles. The ideal Tough Mudder training program is a mix of trail running and Strength /Endurance type of workouts. Everyone has their own goals, but we suggest getting ready for the event  by doing some tactical training. For example, speed work and hill reps will help develop the explosive power needed to go through the whole course unscathed. Build your explosive power and stamina for these events by doing plenty of interval running workouts.

Here is how to proceed on your (first) interval running workout:

Start off the workout with a warm-up for 10-minute. This could be stretching, a very light jog, jumping jacks or some high knees.

Doing this will help you get prepared for the intense work ahead and also prevents injury.

Find a comfortable place you know you can put in some running distance: a track, a long quiet road, etc. Sprint at 80 percent of your maximum speed for a full of 30-seconds. Then, Jog slowly for a full minute for recovery. Repeat the process six to eight times. The intensity and length of each interval depends, mostly, on your fitness level and training goals. Start small, knowing this can be scaled up and down as necessary based on your fitness level. 

Now, onto Hill Training:

Hill training increases both lung capacity and lower body strength. This combo is going to help you overcome many of the obstacles, steep inclines, climbing and so on.

Running uphill increases leg muscles and allows a type of power that boosts fitness, and engages the muscles of the core lower body and the arms. The goal here is to build that stamina. Hill running will make you a stronger, faster and a better runner. Therefore, whether you are doing a short hill sprint, long hill repeats, or adding drills into your hill workouts, these are key to any training program.

Here is a sample workout to try. Again, start at your own level, knowing you can scale up or down accordingly. 

Run 400m at a 5K pace

Perform 40 walking lunges, then 30 standard push-ups.

Run 400m slightly faster than your 5K pace

Perform 40 bodyweight squats, then hold a plank for 90 to 120 second.

Run 400m slightly faster than your 5K pace

Perform 30 burpees, followed by 40 mountain climbers

Run 400m at the fastest pace you can sustain.

Jog for 10 minutes for cool-down.

The great thing about these exercises is that they don’t require long distances to cover – rather, they can get your body in shape for the varied surfaces and distances you might find at a Tough Mudder weekend. Do them in a comfortable place like a well known road or local park with a hill. Make time to do slight improvements with these tips and you will be cruising through the finish line with ease.

Fitness

4 Tips On How To Assess Your Fitness Level

Author: Tough Mudder Bootcamp November 3, 2021
Share on Facebook Share on Twitter

Let’s get real: your physical fitness is your current state of health and well-being that not only impacts your ability to participate in sports and recreational adventures (like a Tough Mudder), but also when performing occupational activities and normal day-to-day tasks. These are our tips to assess your fitness level.

Performing a self-assessment is important, so you can recognize what your capabilities and limits are, so you can progress day over day, week over week and year over year. Becoming your version of “physically fit” takes time, so be patient with the goals you give yourself. 

The goal of this at-home self-assessment is to get you thinking about your level of fitness. It features four exercises to gauge your flexibility, balance, strength, and cardiovascular capacity.

4 Tips To Assess Fitness Level

1. TEST YOUR CORE STRENGTH

Hold a plank: With a watch placed in front of you, get on all fours on the floor with your palms and forearms on the floor with elbows placed directly under your shoulders. Extend your legs and flex your feet so your toes touch the floor. Keeping your abs tight and your back flat, your bodyweight is supported on your forearms and toes. Your body should create a straight line from the top of your head to your heels. Hold this position until you no longer can. Record your time and see how long it took you to perform this task. Use this as a benchmark, depending on how fatigued you are. 

2. TEST YOUR UPPER BODY STRENGTH

Push Ups: The push-up has been around for a very long time because it is simple and effective, both as an upper body exercise  and as a way to measure upper body strength and fitness.

To perform the push-up test, begin in a push up position before lowering your body until your elbows are bent at 90-degree angles. Straighten the arms and return to the starting position. This counts as one repetition.

Do as many push-ups as you can while still keeping good form (your toes, hips, and shoulders should all be in a straight line). Record the number you were able to complete, and use this as a benchmark moving forward based on how fatigued you are.

3. TEST YOUR LOWER BODY STRENGTH

Squats: How many squats can you do? Stand in front of a chair or bench with your feet at shoulder’s width apart, facing away from it. Place your hands on your hips. Squat down and lightly touch the chair before standing back up. A good sized chair is one that makes your knees at a 90 degree angle when you are sitting. Keep doing this until you’re fatigued.

Write down how many squats you can do. Use this as a benchmark for where to start, based on the fatigue level you have at the end of this exercise. 

training man squat jump

4. AEROBIC CAPACITY

Burpees: The burpee is a full body exercise that is generally broken into four positions: chest to ground position, standing, a jump into the air, and hands over ears. This move is a good indicator of leg/upper body strength and cardiorespiratory fitness for aerobics. 

From a standing position, do a squat, making sure to keep your back straight and core engaged. Place both hands on the ground underneath you and jump both legs back so that you’re in a push-up position. Do a push-up so that your chest touches the ground; return to the low squat position. Now, jump up with your feet off the ground and raise your hands above your ears. Do this for 3 minutes straight and record how many reps you were able to do. 

After you record your performance for the above exercises, use these as benchmarks moving forward. Were you completely out of breath? Were you hungry for more? Find a comfortable number that has you complete the exercises by doing it in the correct form, but also feeling like you are accomplished at the end, but have put yourself to the test. 

Understanding where to start is the first step, and we all start somewhere. Use the above as a place to recognize where your goals might be or how to approach an event with an objective in mind. Looking to take on a Tough Mudder? Tough Mudder Training is here to help get you on track to cross the finish line feeling great.

Upcoming Events
VIEW ALL EVENTS
Men forming a human rope to conquer Pyramid Scheme
Choose A Season Pass 2025
Woman holding tightly on two ropes to avoid falling
Philly May 17 & 18, 2025
Michigan June 14 & 15, 2025
Twin Cities June 28 & 29, 2025
Fitness

3 exercises to build your core

Author: Tough Mudder Bootcamp October 14, 2021
Share on Facebook Share on Twitter

Core workouts provide you a solid foundation for all things training, especially when you are trying to incrementally add more workouts in. We provide 3 core workouts here that anyone can do & incorporate into any daily or weekly routine when trying to keep up with your fitness. 

Performing core-only workouts with additional training sessions during the week will allow you to really focus on getting your core stronger and bring up any weaknesses you might have. You don’t want to rush through the exercises, which typically happens if you wait until the end of your workout to hit your core. Also, these “extra sessions” don’t have to be long; just 15-20 minutes will be enough.. Another hidden benefit is that performing extra sessions during the week will improve your overall work capacity, or base level of conditioning.

It doesn’t matter when you get your core work in; just get it in. Having a stronger core will affect everything you do. It will improve your durability (injury prevention), increase your strength and power potential, and help correct your posture.

1. Hollow body hold and hang:

The hollow body hold is a back-friendly way to strengthen the core front.

  • Start by lying flat on your back and then gently lift your legs off the floor while elevating your upper back and shoulders, hollowing your body out.
  • Hold for about 20 to 30 seconds.
  • The hollow body hang is similar to the hollow body hold except you are hanging from a bar with gravity working against your legs and your core is in a slightly different position.
  • The act of hanging from a bar with the shoulders overhead, while also great for your shoulder stability and mobility, adds an extra degree of difficulty for the core as you work extra hard to prevent extension through the lower and middle back.

2. V-Ups:

The full V-up is pretty advanced, but you can always do the modified version as you work up to it. Once you master the V-up, you can even try holding a weighted medicine ball in your hands.

  • Start by lying flat on your back. At the same time, lift your legs off the floor and you back off the floor, bringing your upper body and lower body towards each other while balancing on your tailbone region.
  • Try and touch your hands to your feet (or get as close as you can) and then lower yourself simultaneously to your starting position lying on your back.
  • Perform 8-10 reps.

3. Side Plank Dips:

The first two exercises listed above are great for working the front of your core. The side plank is a great addition because it primarily works your obliques, which are the muscles on your core.

  • Start in a right-side plank with your right forearm and right foot on the floor, your left hand on your hip and with your left leg resting atop the right.
  • You should try to be in a straight line from your feet to your shoulders. Think about trying to form a perfect right angle triangle between your elbow, armpit and right foot. 
  • Slowly lower your hips towards the floor a few inches and return to the beginning position. 
  • Perform 10 reps on the right side, change sides, and do 10 more on the left side.. 

Core Strength and Tough Mudder Training go hand in hand.  A strong core is necessary to complete many of the obstacles we encounter during an event and it even plays a role in our running form.  By improving your core strength, you can improve your event day performance and decrease your risk of injury.  

Fitness

3 tips for building grip strength at home

Author: Tough Mudder Bootcamp October 14, 2021
Share on Facebook Share on Twitter

Let’s get real: the first step in training for Tough Mudder events is to build up your grip strength. Grip strength is more important than most people give credit and requires taking a closer look into. When setting up a resistance training plan, grip training is probably not a go-to lift or set of exercises that may come to mind, but it’s worth incorporating to some degree.

When creating a workout program, people invest countless hours closely examining every facet of their legs, chest, shoulders and back routines. Every possible angle is covered to reach maximum gains… but what most individuals overlook is the benefits of grip strength. Plus, a stronger grip will actually boost your overall strength performance over time. 

When it comes to your grip, there are three unique types of strength.

  1. Crush: Curling your fingers to your palm is your crush strength. Think: crumbling a ball of paper in your hands or shaking someone’s hand.
  1. Pinch: This one is kinda self-explanatory—it’s the strength between your fingers and your thumb, like if you’re pinching yourself.
  1. Support: Your ability to hold onto something for a long period of time, like hanging on a pull-up bar is all about support.
man helping a man over a wall using grip strength

How To Improve Grip Strength At Home

You don’t need dumbbells to work on your grip strength, just grab onto these household items to build a stronger grip: 

Stress-Ball Squeeze/ Tennis Ball 

Squish a stress ball (a tennis ball works too) with your entire hand for 5 to 10 pulses. Repeat using just your thumb and pointer finger. Progress through each finger, then switch hands and repeat this sequence.

Grocery bag farmer’s walks: What’s better than taking only one trip to bring your groceries inside? Absolutely nothing. You can use those tough, reusable bags and load them up with anything. Stand in place or walk around the neighborhood.

Rubber Bands:

Snag one off those rubber band balls in your desk and do these simple rubber band extensions with your fingers.If one band gets too easy, put two or more on! This is a super easy exercise to do while you’re on a phone call or watching TV. It gets the blood moving through the hands and helps balance out your vice-grip. 

Book Pinches:

Grab the biggest, heaviest book you have. Grab it in that pinch grip position (fingers on one side, thumb on the other). This may be easy, if so, then “walk the book” in your hand by moving your fingers up and down the spine while you hold it in mid-air. Do this for several trips. Tough!

Towels During Pulling Exercises

You can add ropes or towels to just about any pulling exercise.  You still get the benefit of the pulling exercise but with the significant challenge on your grip strength in all three ways.  The sky’s the limit with your creativity here.

Ideally for obstacle course events, you’ll need to incorporate exercises that involve crush, pinch & support strength. You’ll find you’ll need both crush and pinch strength for obstacles – especially those in which you’ll need to grab a teammate’s hand, like Everest. Monkey bars & rigs require support & crush strength whilst any type of hoist obstacle involves crush & support too.

Do these on a regular basis, and you will be flying across Funky Monkey on the Tough Mudder course in no time.

Posts navigation

Older posts
Newer posts

Search

Recent Comments

    Archives

    Categories

    • No categories

    Meta

    • Log in
    • Entries feed
    • Comments feed
    • WordPress.org

    Our Partners

    Govx logo
    US Border Patrol logoWilde logo

    SUBSCRIBE TO OUR NEWSLETTER

      This site is protected by reCAPTCHA and the Google Privacy Policy and Terms of Service apply.
      • Connect
        • Partnership Inquiries
        • Licensing Opportunities
        • Media Requests
        • Contact Us
      • Explore
        • Endurance Results
        • 100X Hall of Fame
        • Community Guidelines
        • Become an Ambassador
        • FAQ
      • About
        • What is Tough Mudder?
        • TM in the News
        • Meet Our Partners
        • Join Our Team
        • Promotional Terms & Conditions
        • Legal & Privacy Policies
      • Follow Us
      Select Region
      • US & Canada
      • United Kingdom
      • Germany
      • France

          Left Arrow Created with Sketch.
          Right Arrow Created with Sketch.